Inmotion hosting offers a free migration service. You can log into your Account Management Panel and submit a Website Transfer Request by providing some important information like the old host’s username and password. They will get your site moved from the old host(Godaddy) over to Inmotion Servers within 14 days depending upon the size of the website, platform/OS and complexity of programming, etc.
But what if you want to do it yourself? Well, You can move your site from Godaddy to InMotion Hosting within an hour with zero downtime. You can do it yourself without having no or little technical skills. Being not able to afford renewal, I keep moving my site from one host to another. The following guide is not only valid for moving to Inmotion Hosting from Godaddy but also to migrate any WordPress website from one host to another. Basics always remain the same –
Somehow you have to move WP-Content Folder + Database + WP-Config File from the old host to the new host.
Let’s start moving your WordPress website from Godaddy to Inmotion Hosting without going down-
TO DO LIST Before You Start Migrating Your Website
Before you start moving the website from one host to another, you should clean up your website, so that you can make a backup smaller, easier, and faster as much as possible. Here are steps you can take to clean up your site –
- Delete all the unused plugins
- Delete all the themes you are not using
- Delete spam comments and empty trash comments
- You can also delete post revisions and images or files you are not using to save a lot of space
- Delete the old backup files(if there are any you have created before) from the server after downloading them to your computer
- Clean and optimize the database using a suitable plugin
1. Install ‘All-In-One WP Migration‘ Plugin on Your Old WordPress Site (Godaddy)
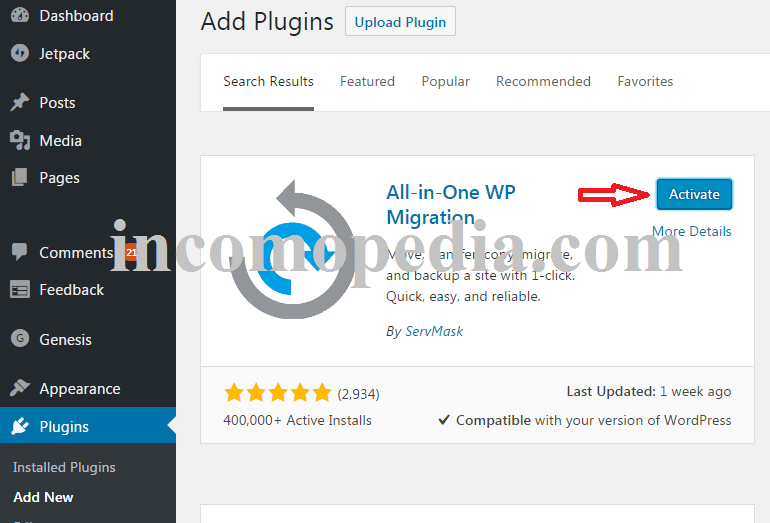
This is the first thing you have to do in order to move your blog from Godaddy to Inmotion Hosting. All-in-one WP migration plugin is free and currently installed on 400000+ WordPress blogs. I personally have used it 3 times to move my WordPress site successfully without any downtime. Activate the plugin after installing it. Pictorial Guide to install WordPress plugin
2. Take a Backup of Your Old Website
Once you have installed and activated the All-In-One WP Migration plugin, roll your cursor over All-In-One WP Migration in your WordPress admin area and click on Export.
There are advanced options to let spam comments and post revisions not be moved to the new host.
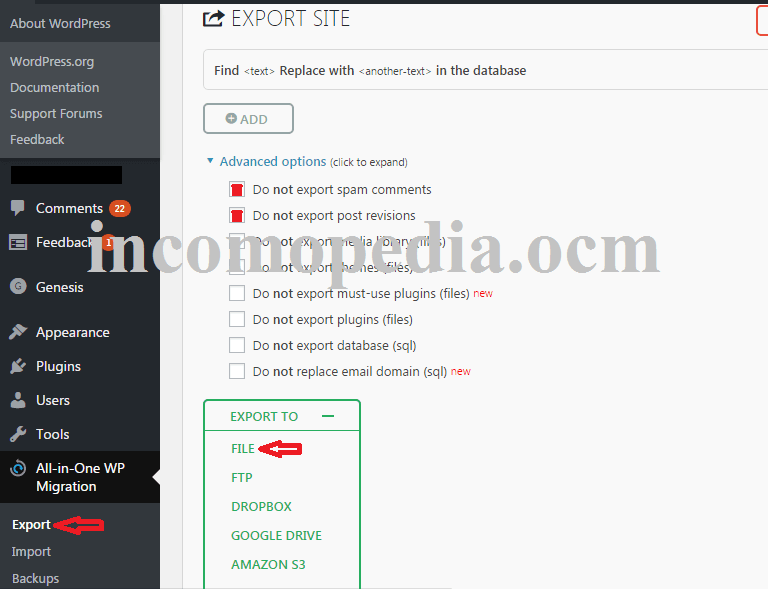
Click on Export to and choose where you want to save your backup file. You can download the backup to your computer, Google Drive, Dropbox, etc.
Click on File to save the WordPress backup to your computer. As soon as you click on the file it would start archiving all the WordPress files and database. It gives an option at the end to download the backup file.
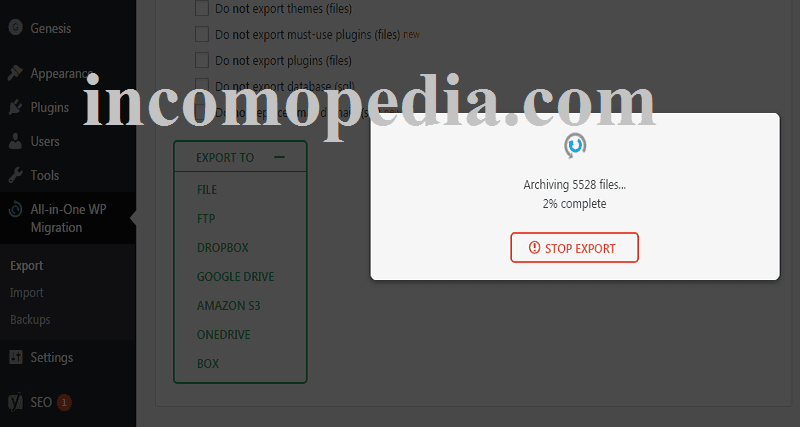
Click on Download to download WordPress backup and save it on your computer.

You are done with your old WordPress website. You probably won’t need to log into it again.
3. Install WordPress on New Host (Inmotion Hosting)
You can skip this step if you have already installed WordPress on Inmotion Hosting. Otherwise, Log into your Account Management Panel or AMP on Inmotion Hosting. Under the Account section, Click on C-Panel. Scroll down to the bottom in the control panel and Click on the WordPress icon.
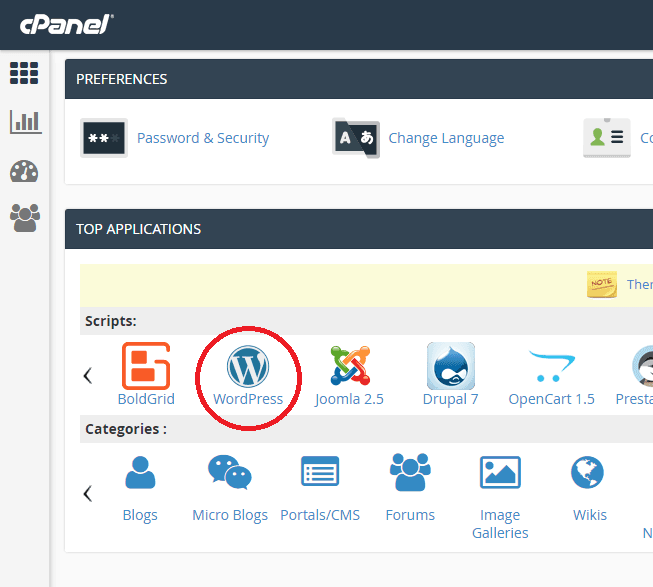
Install the WordPress.
4. Change the Hosts File on Your Computer to Prevent Downtime
You can skip the step if you don’t mind losing your visitors for a few hours. So far, You have a backup file of your old WordPress website and a fresh WordPress installation on the new host. But you can not log into the new WordPress dashboard because the Domain name is still pointing to the old host(Godaddy).
The catch here is that you don’t need to point your domain to Inmotion Hosting Servers to be able to access your new WordPress dashboard. Yes, You have heard it right. Let’s access the new WordPress dashboard without pointing the domain to Inmotion Hosting servers.
Remember the rest of the world is still accessing the old site. Only you will be able to see Your new WordPress website.
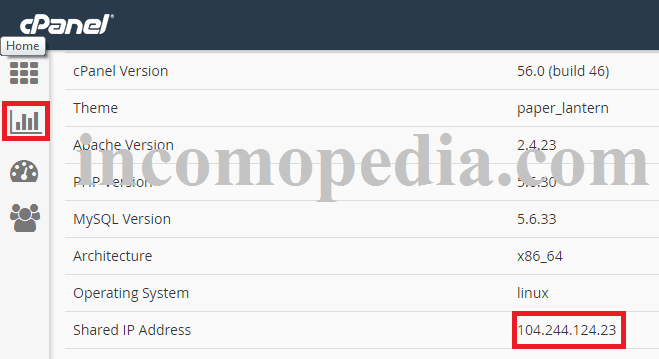
All you need is the IP address of the servers at your new host. To get the IP address, Open CPanel in Inmotion Hosting, Click on Statistics and open server information, and Copy the IP address.
Now Go to my computer>> open C drive >> Windows >> System 32 >> Drivers >> ETC >> Open Hosts File in notepad
Paste the IP address at the end of the ‘hosts’ file as shown below –
104.244.124.23 yoursite.com
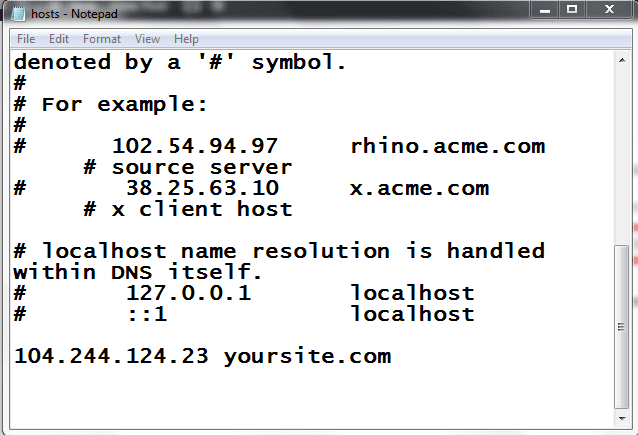
Save the file. Now Try to login into your WordPress dashboard. You will see a new WordPress dashboard from Inmotion Hosting.
Note: Revert these changes once you have migrated the WordPress successfully.
5. Install All-In-One WP Migration Plugin on Your New WordPress Site
Install the same All-In-One WP Migration plugin on the New WordPress website.
6. Start Migration Process with All in one WP Migration Plugin
Once you have installed and activated All-In-One WP Migration on the new WordPress site, Go to Import from the left dashboard panel under the All-In-One WP Migration plugin.
Click on Import From and choose the option where you have saved the backup file of the old WordPress website. Click on the File and browse the location of the WordPress backup file on your computer. After selecting the WordPress backup file, click on Import. The plugin will unpack the archive and restore all the files on the new host automatically at a suitable location. Wait until the migration process is completed.
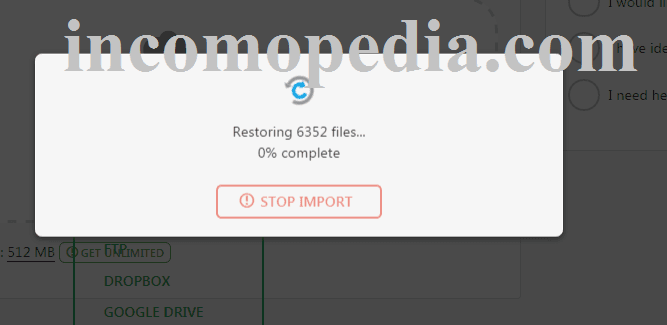
Once the migration has been completed, Make sure everything is working perfectly. Logout and re-log into the WordPress dashboard if changes are not appearing. Check if all the posts are there. Go to setting>>Permalinks and save after selecting desired URL structure.
Your WordPress site now has been moved from Godaddy to Inmotion Hosting. But you are not done. Everyone else except you is still redirecting to the Old host(Godaddy). You have to point the domain name to the new host(Inmotion Hosting).
7. Point Your Domain Name to Inmotion Hosting Servers
Tell your visitors that your WordPress website has been moved to a new location. In order to do that, you have to update the DNS nameservers from Inmotion Hosting AMP.
Log into Inmotion Hosting AMP
On the main menu, roll your mouse cursor over Domains and click Manage Domains.
Select Domain name and Click the Point your domain link. Enter Following Primary and Secondary Nameservers in the space provided. –
ns1.inmotionhosting.com
ns2.inmotionhosting.com
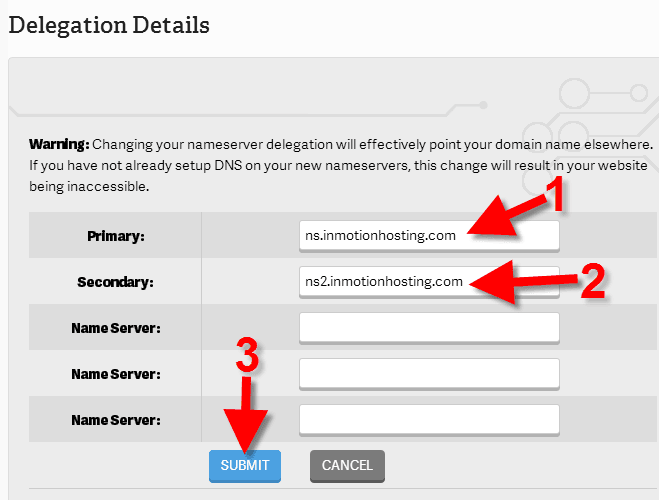
That’s it. You are done now.
Remember that it may take up to 24 hours before these changes begin to take effect. But you don’t have to worry since the visitors are still accessing the same website from the old host and everything is the same here and there. Until the propagation takes place, they will see the old site and as soon as the domain name is pointed to Inmotion Hosting servers, they will be redirected to the new website. Since both have the same content, they won’t find any difference.
