Recently I added Adsense Auto Ads to my genesis theme and I just want to tell you how easy it all was. But before we go, let me first introduce you to Adsense Auto Ads, perhaps the most innovative kind of ad type in the industry. You just have to place one piece of code on your website and Adsense will automatically identify the best locations on your blog and place ads on your behalf. You no longer need to mess up with a lot of different ad codes of different ad formats.
Benefits of Using Adsense Auto Ads
To decide where to place an ad, Adsense Auto Ads uses machine learning. I see some great benefits of using this powerful way to place ads on a website. Here are some worth mentioning –
- Easy to Use and Save Time- Since you have to place one little code on your website, it is not only easy but also time-saving. If you want or do not want to show a particular ad format, you can turn it on or off from your Adsense account like we do in the Infolinks ad network.
- Google Adsense Knows it Better – Beginners like me don’t know where should they place ads for optimized profit and the best user experience. Let Adsense decide ad placement on your behalf because it knows better.
- Increase Revenue and Improve User Experience- Auto ads put ads where they are most likely to be clicked. Also, it would be great to utilize the long empty spaces without ads in long articles.
Note – If you already have Adsense Ads placed on your blog, you don’t need to remove them. Auto Ads will take into account all those. Or you can remove some low-earning ads. It’s entirely up to you.
Placing Adsense Auto Ads in Genesis Theme
Okay, let’s get started. There are several ways you can enable Adsense Auto Ads on any Genesis Child Theme. Have you generated Adsense Auto Ads Code? If yes, skip this part. If not,
- Login to your Adsense Account.
- From the left Panel, Click on My Ads
- Select Get Started. On the Choose Your Global Settings page, Select all the ad formats you want to show on your website.

 Click on Save. You can also change Global settings later.
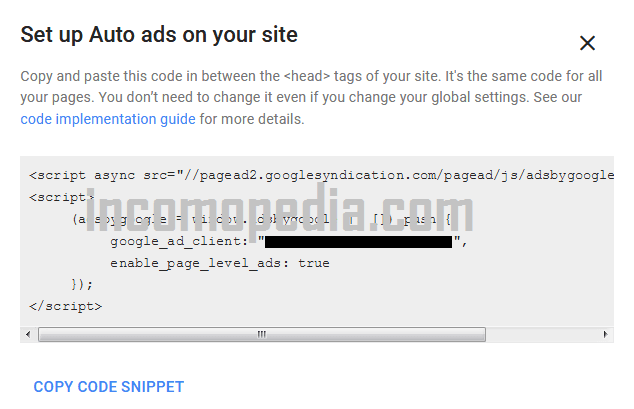
 - On the last page, You get a code snippet. Copy the Code

You have to place this code between <head> and </head> tags of the pages you want to show ads on.
There are different ways to enable Adsense Auto Ads on Genesis using Ad code or without using Ad code. Let’s see them one by one –
Enable Auto Ads Using Genesis Theme Setting
To place Adsense Auto Ads using Genesis Theme Setting –
- In the WordPress dashboard, Go to Genesis>>Theme Setting from the Left Panel
- Scroll down until you see an option to enter your Google Adsense Publisher ID

- Enter Your Google Adsense Publisher ID in recommended format and Save Settings. That’s it. No need to place any code anywhere. Just make sure you have configured Global Settings in Your Adsense account. You can find Your Adsense Publisher ID in the Account Setting of your Adsense account.
Another way to accomplish the same thing is present on the same page
- Go to Genesis>>Theme Setting. Scroll down to the end until you find the heading – Header and Footer Script
- Copy Your Auto Ads Code and Paste in Header Scripts Box as shown below

- Click on Save Changes. You are done. Ads will start appearing in a few minutes.
Enable Auto Ads Using Theme Setting in Customiser
- In the WordPress Dashboard, Go to Appearance>>Customize>>Theme Settings>>Google AdSense
- You will see a box to enter your Adsense Publisher ID.

- Enter Your Adsense Publisher ID in Required Format. Wait a few minutes and your Adsense ads will be live on your website.
So these were a few ways how you can enable Adsense Ads in any genesis theme using Global ad code or Publisher ID. Hope you find it easy and useful. Share it among your friends.

Thanks For Sharing Info,Recently I Installed genesis Theme But Not Show Header Ads.Your Are Give the very Helpful Information